New Food Sample
Clicking on the New Sample button from the Main Data Entry Screen starts the new sample entry process.
Admin tab
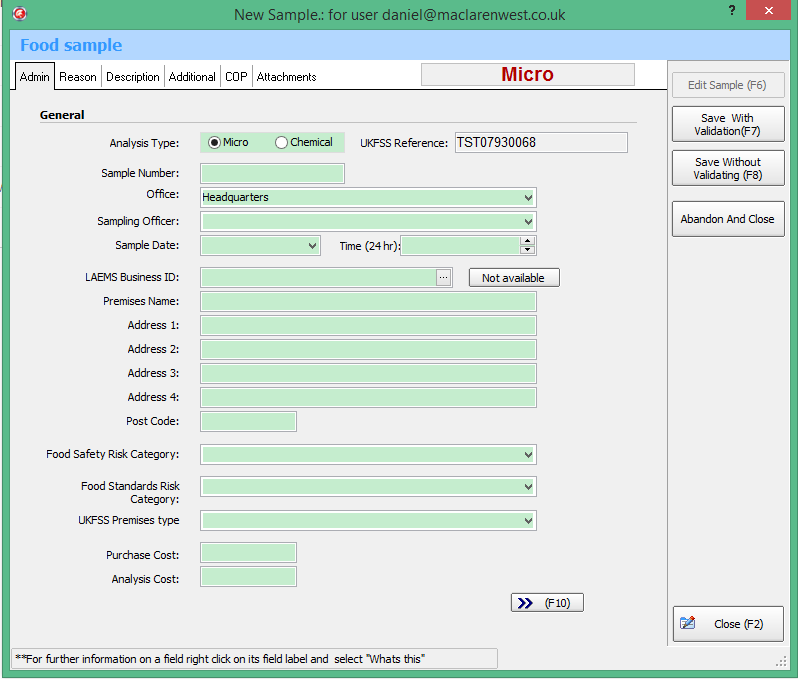
Food Sample Admin Details
- Analysis type
Select Micro (Microbiological) or Chemical option by clicking either option on the radio button to their left.
Micro Microbiological sampling is undertaken to ascertain the microbiological quality of the food and to determine the possible presence or absence of harmful microorganisms in particular foods. These samples are then transmitted electronically through the SFSD Desktop to your chosen public health Laboratory.
Chemical Food samples submitted for chemical sampling may undergo specific analyses such as for contamination, presence of additives, compliance with nutritional standards and labelling. These samples are then transmitted electronically through the SFSD Desktop to your chosen public analyst Laboratory.
- National Ref
This unique sample reference number is created by the SFSD Desktop application locally once the sample being entered is saved.
- Sample Number
Use this space if you wish to enter your own local authority reference number. This is the number by which the sample can be identified by your Local Authority.
- Office
Where a local authority/council has more than one separate office in different locations, each of the office locations can be created using the configuration part of the system, and then selected from the drop down list. This must be set up using the configuration toolbar in the reference drop down menu or in the set up menu. Please contact your SFSD Desktop Administrator or the SFSD Helpdesk regarding this.
- Sample Officer
Where your local authority/council has a number of officers taking food samples, the names and contact details for each of the officers can be added to using the configuration system in SFSD System, then selected from the drop down list here.
- Sample Date
This should be the date that the sample was taken. The date is selected by clicking on the tab to reveal the calendar. The following shortcuts are available Shortcuts implemented - tod(ay), tom(orrow), y(esterday), m(onday), tu(esday), w(ednesday), thu(rsday), f(riday), sa(turday), su(nday).
- Time
(24HR) This should be the time that the sample was taken.
- LAEMS Business ID
(Select from drop down list)
This data is pre-imported from your local authority MIS premises database as part of the initial configuration process. Once a month (or at a suitable interval) this part of the SFSD Desktop system must be updated as part of the routine housekeeping required by maintaining the system accurately. Please refer to the SFSD Desktop Configuration Guidance Notes.
Once imported into SFSD Desktop and a business is selected, the Premises Name and Address information will populate automatically. This is the unique identifying the local code of the business as listed in your premises database in your local authority MIS.
(This field is mandatory in order to enable the SFSD to extract LAEMS return data from SFSD Desktop as part of the annual LAEMS return for food sampling data)
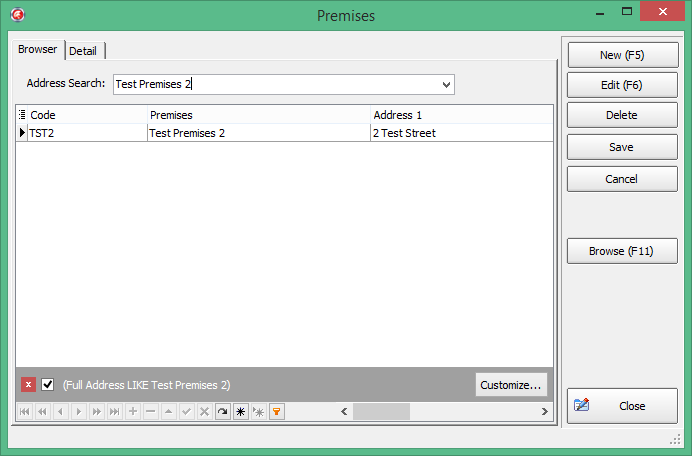
Searching the premises list within SFSD Desktop:-
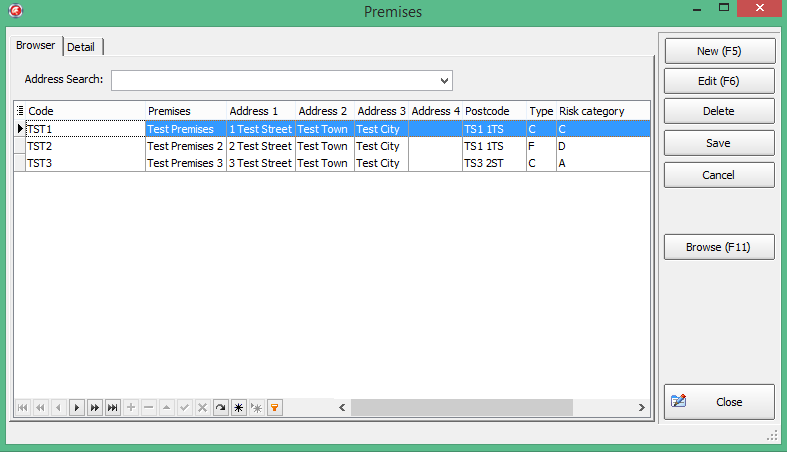
By typing in any element of the premises address the list will filter and find what’s in your premises uploaded data automatically.
- Premises Name
This is the name that the business from which the sample was taken is trading under. This information will usually be imported from your premises database as part of the start-up and regular configuration. For more information, please refer to the SFSD System System Configuration Guide [Please contact your local SFSD System Administrator for more information]
- Address
The address of the premises from which the sample was taken. This information will usually be imported from your premises database as part of the start-up and regular configuration. For more information, please refer to the SFSD Desktop System Configuration Guide [Please contact your local SFSD Desktop Administrator for more information]
- Post Code
The postcode of the premises from which the sample was taken. This information will usually be imported from your premises database as part of the start-up and regular configuration. For more information, please refer to the SFSD Desktop System Configuration Guide [Please contact your local SFSD Desktop Administrator for more information]
- Food Safety Risk Category
The category in which the business was rated at the last food safety primary inspection. This information will usually be imported from your premises database as part of the start-up and regular configuration. For more information, please refer to the SFSD Desktop System Configuration Guide [Please contact your local SFSD Desktop Administrator for more information]
- Food Standards Risk Category
The category in which the business was rated at the last food standards primary inspection. This information will usually be imported from your premises database as part of the start-up and regular configuration. For more information, please refer to the SFSD System System Configuration Guide [Please contact your local SFSD System Administrator for more information]
- SFSD/LAEMS Premises Type
The type of premises from which the sample was taken, this label can be either SFSD Premises type or LAEMS Premises type depending on the option selected in the system setup screen.
This information will usually be imported from your premises database as part of the start-up and regular configuration. For more information, please refer to the SFSD Desktop System Configuration Guide [Please contact your local SFSD Desktop Administrator for more information]
If you are manually selecting the descriptions and your Local Authority management system is using the LAEMS descriptions please note the corresponding SFSD Desktop descriptions.
LAEMS Description
Corresponding SFSD Desktop Description
Primary producers
Primary Producers
Manufacturers & packers
Manufacturers/processors
Importers/Exporters
Importers/Exporters
Distributors/Transporters
Distributors/Transporters
Supermarket/Hypermarket
Retailers
Smaller retailers
Retailers
Retailers – Others
Retailers
Restaurant/Café/Canteen
Restaurants and other Caterers
Hotel/Guest House
Restaurants and other Caterers
Pub/Club
Restaurants and other Caterers
Take-away
Restaurants and other Caterers
Caring Establishments
Restaurants and other Caterers
School/College
Restaurants and other Caterers
Mobile food unit
Restaurants and other Caterers
Restaurants and caterers - other
Restaurants and other Caterers
- Purchase Cost
The amount paid for the sample (where required). This is not a mandatory field.
- Analysis Cost
This is an optional field and is only included for Local Authority use. The actual cost of analysis of the sample can be entered here.
Reason tab
Click on the Reason tab next to Admin at the top to access this screen.
Enforcement/Investigation
Select Enforcement/Investigation by clicking on it and checking the radio button.
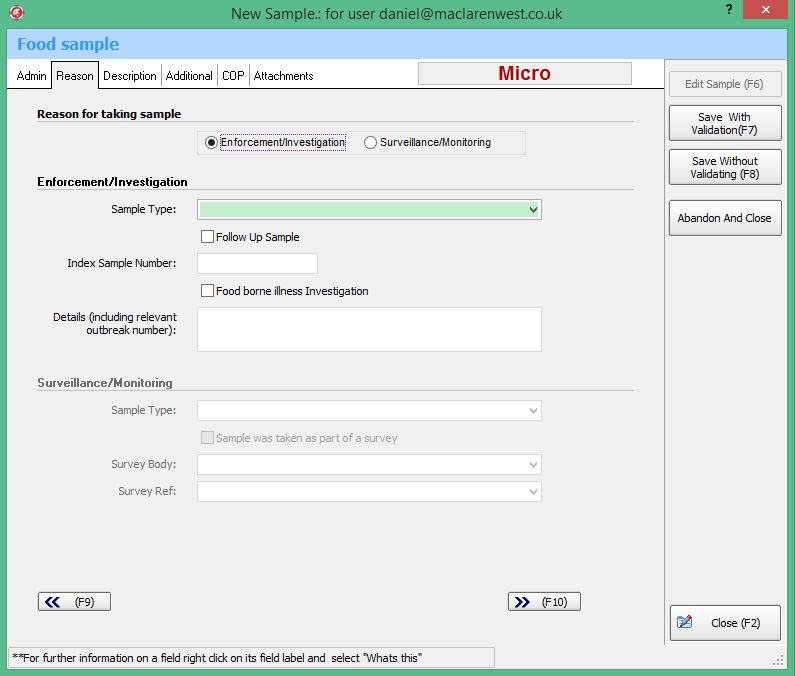
- Reason for sample taken
Enforcement/investigation – these are samples which have been taken in response to a particular incident, allegation or contravention.
If this option is selected – the following will appear
- Sample Type
Control/food complaint/formal/informal/other
- Follow up sample
If this sample was taken following on from a preceding sample (e.g. after the first sample failed)
- Index sample number
This is the number relating to the first sample taken, in order that preceding samples can be linked to this
- Food borne illness investigation
Tick this box if this sample was taken as part of an investigation into an alleged case of food-borne illness
- Details
(including relevant outbreak number)
This number is generated by the Local Authority and allows all samples forming part of the outbreak to be linked. Sample numbers should be in a format that is recognisable to the Local Authority and can be easily traced and retrieved. If a sample is given a number that is too simplistic (e.g. 1/2008), it could be replicated by other Authorities inputting similar numbers, making retrieval and identification difficult. Prefixing the number with a code for the Local Authority (e.g. XYZ/1/2008) would resolve this potential issue. This will also assist in the event that an outbreak spreads across Local Authority/Health board boundaries, in that the initiating/coordinating Authority can be recognised.
Surveillance/ Monitoring options
Select Surveillance/Monitoring by clicking on it and checking the radio button.
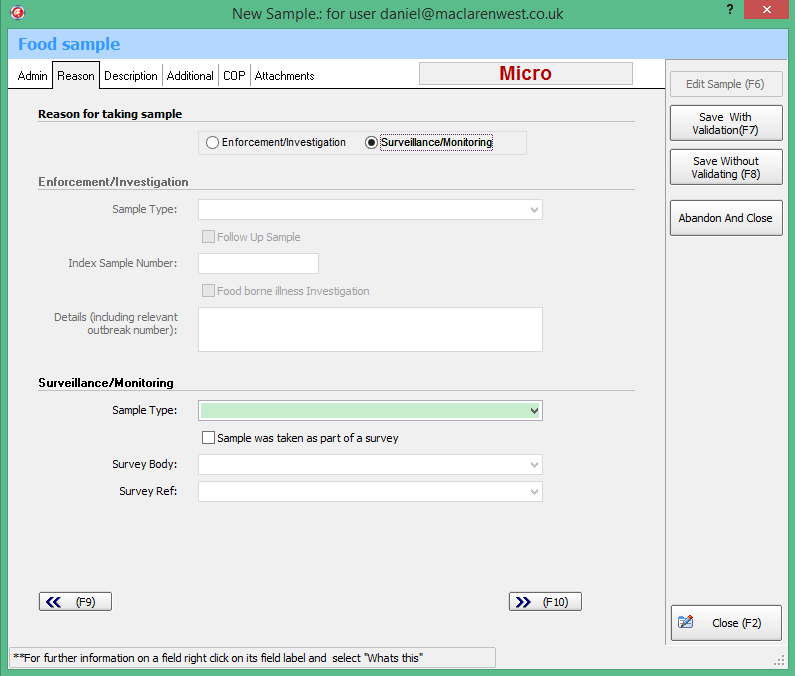
Reason tab options
These are programmed samples taken as part of a Council’s sampling plan or survey.
If this option is selected – the following will appear:
- Sample type
Choose either formal or informal.
All samples – for both microbiological examination and for chemical analysis – that are taken by an Authorised Officer and sent to an Official Laboratory are considered to be official control samples. Subject to the current Food Law Code of Practice these samples can be submitted as formal or informal samples.
Official control samples to be entered as ‘formal’ on SFSD are those taken in accordance with the Food Safety (Sampling & Qualifications) Regulations 2013 and the current Food Law Code of Practice in your country i.e. those for which formal enforcement action and/or legal proceedings may ensue or may be considered. To ensure satisfactory procedures, it is good practice to discuss submission of formal samples with the relevant Food Examiner or Public Analyst prior to submission.
Official control samples that should be entered on SFSD as ‘informal’ are described in each UK Food Law Code of Practice. These include samples that are:
the subject of complaint and are brought to the Food Authority by consumers or other agencies (these are not suitable for microbiological examination as official control samples);
submitted to the Public Analyst or Food Examiner for local authority surveillance purposes alone, i.e. there is no intention at the time of sampling that any formal enforcement action will ensue from the result;
procured in accordance with food law that are not taken for analysis or examination, such as samples submitted for the opinion of other experts e.g. pest identification etc;
taken as evidence in their own right e.g. use-by dates.
- Sample was taken as part of a survey
This applies where a number of samples are all taken for a specific survey purpose (e.g. a set time period during which monitoring of a specific product is undertaken).
If this box is checked, the following will appear –
- Survey body
The name of the body or organisation that is instigating/coordinating the survey e.g. Food Standards Agency etc.
- Survey ref
This reference number allows all samples forming part of the survey to be linked. The first part of the survey number will normally be provided by the ‘Survey body’ (see above) to show that the sample forms part of the wider survey, with an option to add further identifying numbers for each sample if required (to allow identification of each unique sample forming part of the larger survey). It is important this field is accurately completed to ensure all survey samples can be viewed in the central database (CFAD).
Description
Click on the Description tab at the top to access these options.
Todo
Replace screenshot as it mentions FSA code instead of SFSD Code
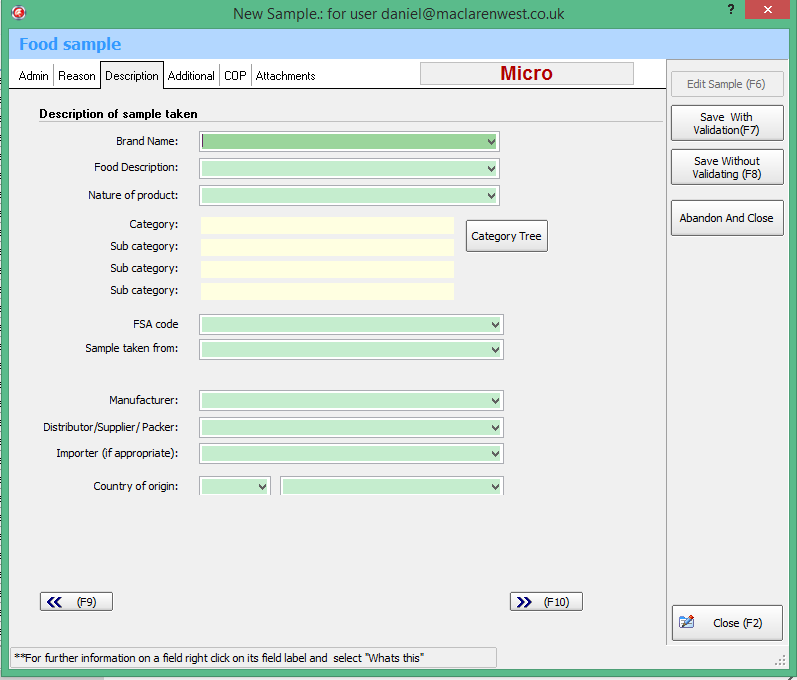
- Brand name
The name that the product is sold under. Do not enter the name of the retailer if the product is just sold there and do not just repeat the name of the food. For:
pre-packed branded products, enter the brand name, eg ‘Heinz’ or ‘Kellogg’s’.
pre-packed own branded products, typically from supermarket chains, enter ‘[Retailer] own label’, eg ‘Tesco own label’, ‘Asda own label’.
food sold loose, eg from a staffed counter in a supermarket or fresh fruit and vegetables, if a brand name can be identified, use it (bearing in mind that it could be ‘own label’). If not, enter ‘No brand’.
ingredients/packaged goods sold in a restaurant/café/takeaway, if a brand name can be identified, use that. If not, enter ‘No brand’.
meals, enter ‘No brand’.
- Food description
A basic description of the type of food sampled.
Where there is a name laid down by law this must be used. If not, a customary name may be used. If there is no customary name or it is not used, a descriptive name must be used. This can also be setup in the Optional Look up List are in the Reference drop down menu. This is a free text area and an example is shown below. Once saved, the options will appear in the Food description drop down menu.
- Nature of product
These are pre populated with the following categories:
Ready to Eat
Processed
Raw
Swab.
Note
Please refer to Appendix A for more details
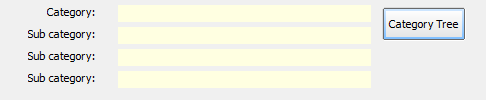
Category Tree
This is accessible via the Category tree button within the description tab of the input process:-
Once the Category tree button has been selected you will be presented with the following screen:-
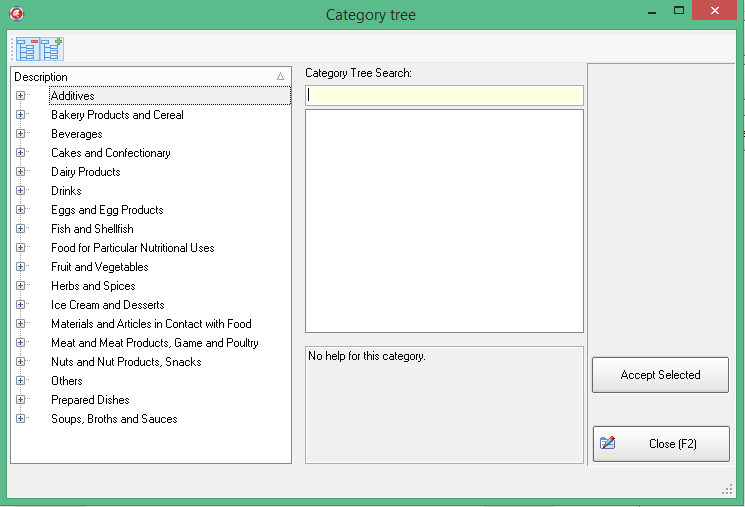
The box highlighted is where you input your keyword in order to search the category tree.
The example below demonstrates the process of selecting “Fresh Fish”
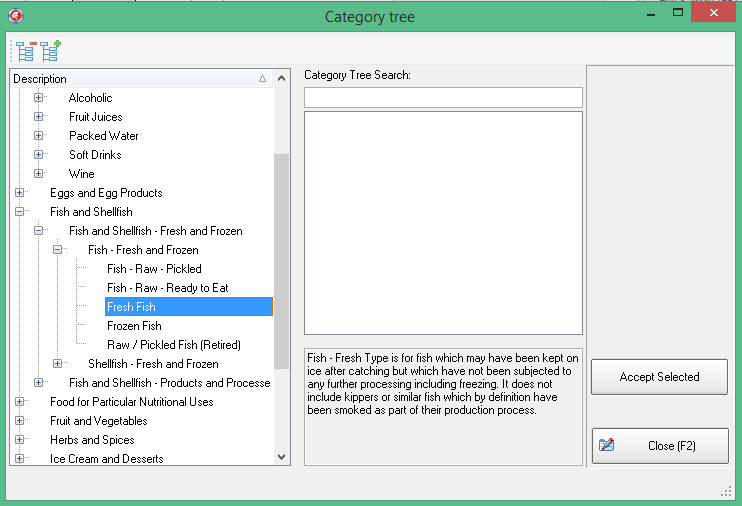
As you type, the system will dynamically search through the category tree displaying any descriptions that contain or match your search criteria.
You will notice that each result is prefixed with L1, L2, L3 or L4; these represent the different sub category levels within the category tree.
Note
The system requires the level 4 description to proceed so in the event that the L3 and L4 descriptions are the same i.e. “Sweeteners” the L4 description should be selected)
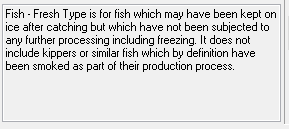
With the Level 4 category highlighted the corresponding category description will be displayed in the panel below the category selection.
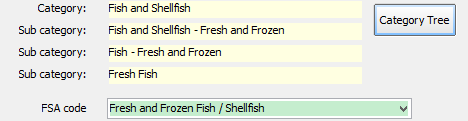
Once you have accepted the category (‘Accept Selected’ button) all of the relevant category fields within the Sample description screen are automatically filled in.
- Sample taken from
(For microbiological samples) The Food Hygiene Regulations 2006 requires microbiological food samples that are submitted to the laboratory to be clearly identified as having been taken from a producer or from a retailer. This information must be provided for particular foods as detailed in these Regulations and determines the tests and pass/fail criteria for assessment by the food examiner. This is a compulsory field and there is an option to select ‘N/A’ when appropriate.
- SFSD code
SFSD codes are pre-populated and are linked to the ‘Category Tree. This field is automatically populated following completion of the category tree fields.
- Manufacturer
If the name of the manufacturer is available from the product label, enter it here
- Distributer/ supplier/ packer
If the name of the company distributing/supplying or packing the food is available from the product label, enter it here
- Importer (if appropriate)
If the name of the person or company importing is available from the product label, enter it here
- Country of origin
If the Country that the food originated from is available from the product label, select the country from the drop-down menu. Sub-categorised into “UK”, “EU” and “Non EU”.
There are also the options of UK-Not specified/EU-Not Specified/Non EU-Not Specified.
Additional
Click on the Additional tab next to the Description tab at the top to access this window.

- Packaging provided
The way in which the product was packaged for sale (if applicable). Select from the drop down menu. (Also See Appendix B for definitions)
If ‘not pre- packed’
(e.g. meats sold loose from a deli-counter) – The Labelling button will appear which will allow you to populate information on labelling details. [For further information refer to Appendix A]
Labelling This heading relates to non pre-packed foods. This is the information that would have been supplied at the counter/display etc, e.g. minimum meat content etc. and can be selected using the options provided.
- Packaging material
This heading applies to foods that are pre-packed. Select the type of packaging from the drop down menu.
- Other material
This is where ‘other’ field has been selected from the drop down menu in the ‘Packaging material’ category, above. Type in a description of the type of material used for packaging the product Pack quantity/size – this can be taken from the packaging (e.g. 500(g) – the number should be entered here, the units in the ‘pack units field below) (Also See Appendix A)
- Pack units
These are the units stated on the size/weight/capacity of the product e.g. grams, kgs, mls etc (e.g. 500(g) – the (g) would represent the pack units)
- Batch/Lot no
Some products will contain batch or unit number to allow traceability by the manufacturer. This can be taken from the packaging, where applicable.
- Health Mark
Some types of foodstuff (e.g. live bivalve molluscs; minced meats; dairy products) require to be produced by a manufacturer/premises that have been approved by the local authority. To demonstrate that the food has come from approved premises, the food is marked with a ‘health mark’. There are differing forms of health mark depending on the intended destination of the product (e.g. for sale nationally, across Europe etc). Please see section 5 of the Code of Practice Guidance for further details.
- Durability
The way that durability is entered will depend on the information on the label. For example, ‘best before’ and ‘use by’ will normally have a day, month and year that can be entered from the product label. ‘Best before’ would normally only carry a month and year.
- Condition
This is the condition in which the product was held in the store from which it was sampled, e.g. at ambient temperature, chilled, frozen etc. This can be selected from the drop-down list. If other, specify
- Temperature
For products that are not stable at ambient temperatures, the air temperature of the cabinet or area in which the food has been stored should be taken and recorded. A negative number must be entered for frozen products. Please see the Code of Practice guidance for further details on obtaining temperatures when sampling.
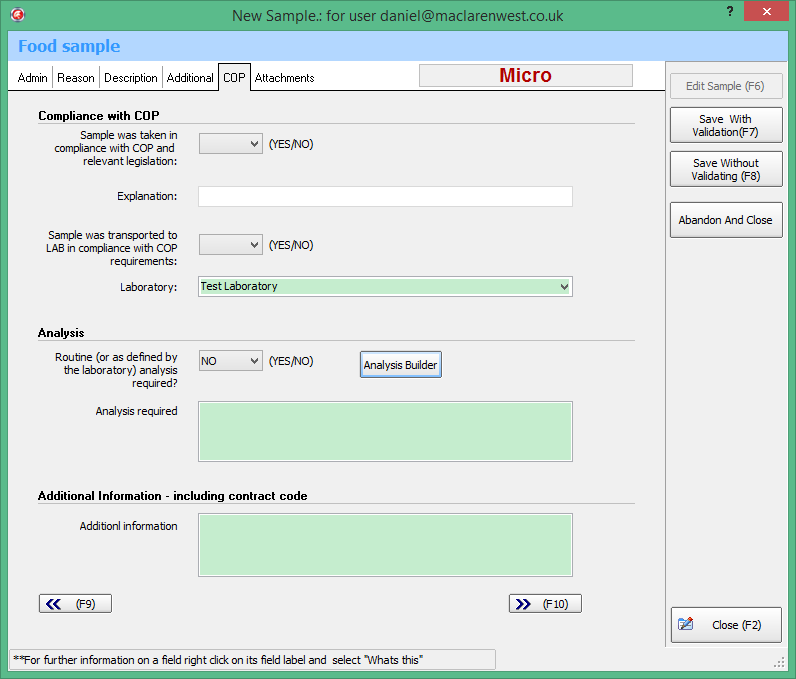
Code of Practice
Click on the COP tab next to the Additional tab at the top to access this window.
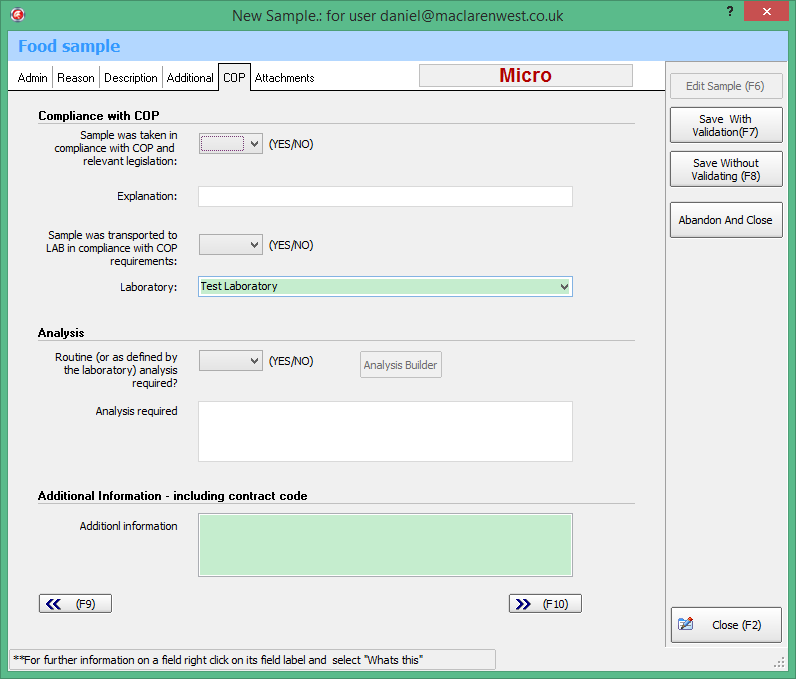
- Sample was taken in compliance with COP and relevant legislation:
Guidance for the taking of samples can be found in the documents ‘Guidance on Food Sampling for Microbiological Examination, January 2002’ produced by LACORS and in the Food Standards Agency’s document ‘Practical Sampling Guidance For Food Standards And Feeding Stuffs, Part 2: Food Standards Sampling‘. In Scotland, in order to comply with the requirements of the Code of practice, the taking of the food sample should normally be witnessed. (Also See Appendix A)
- Explanation:
If the sample was not taken in compliance with the COP, state the nature of the deviation from the COP and the reasons why.
- Sample was transported to lab in compliance with COP requirements:
Guidance for the taking of samples can be found in the documents ‘Guidance on Food Sampling for Microbiological Examination, January 2002’ produced by LACORS and in the Food Standards Agency’s document ‘Practical Sampling Guidance For Food Standards And Feeding Stuffs, Part 2: Food Standards Sampling‘. In Scotland, in order to comply with the requirements of the Code of practice, the taking of the food sample should normally be witnessed. (Also See Appendix A)
- Laboratory:
The laboratory that the sample was sent to. Names of the relevant labs can be pre-installed into the drop-down menu.
- Analysis - Routine (or as defined by the laboratory) analysis required?:
Select ‘Yes’ if you require the routine suite of analysis to be undertaken by the laboratory, Select “No” to launch the “Analysis Builder” [see page 18] to choose from user specified non routine analysis suites.
- Analysis required:
If tests other than routine are required to be undertaken on the sample (i.e. ‘no’ has been answered to the question above), state the nature of the analysis that is to be undertaken by the laboratory
- Additional information including contract code:
Todo
Add something here
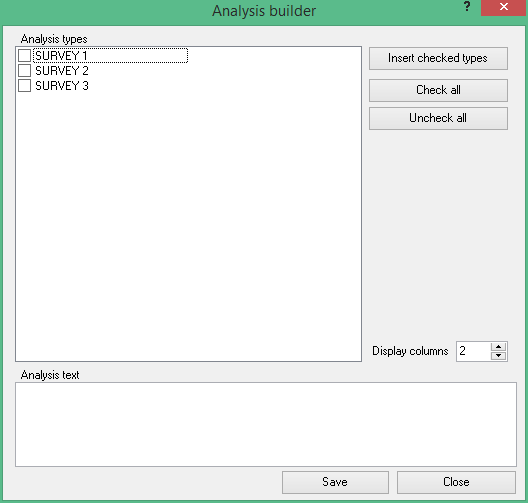
Analysis Builder
In the event that analysis other than routine is required the analysis builder will provide a way to easily associate predefined test suites (as agreed with your Lab) to the sample.
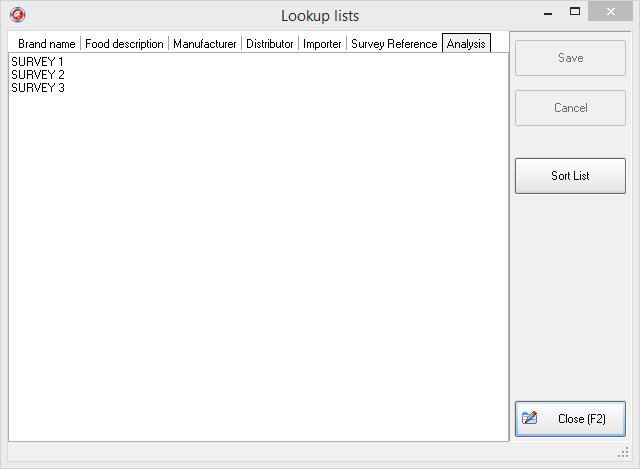
To use this feature you first have to populate the “Analysis” screen within the optional lookup list (see Optional lookup lists)
In the example below there is a list that provides 3 testing suites.
In relation to the ‘Analysis required’, if you choose ‘no’ the analysis builder button is activated. .
Select the analysis builder button, then select the appropriate testing suite/s, insert checked types and press save.
Attachments
Click on the Attachments tab next to the COP tab at the top to access this window.
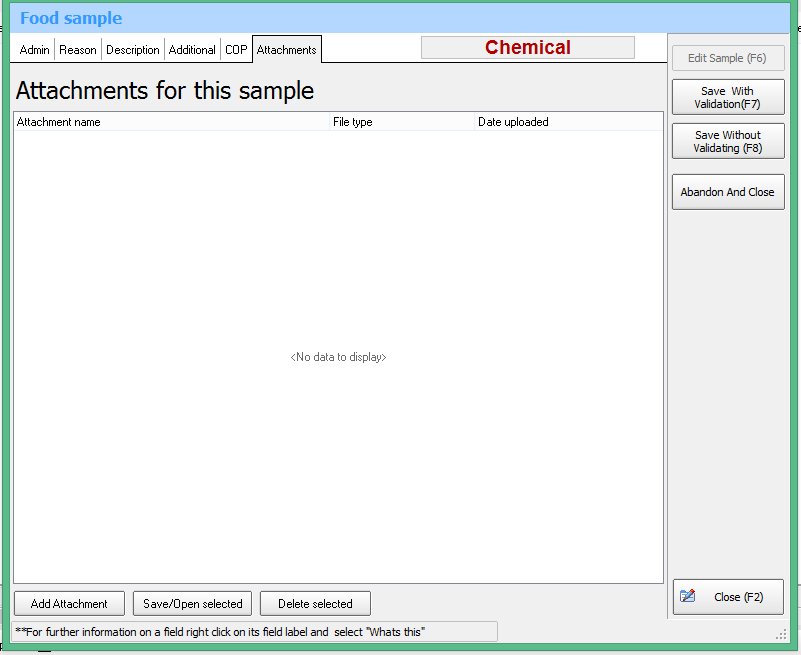
In order to add an attachment, select the ‘Add Attachment’ button
A dialogue box will appear asking you to select the file that you wish to attach. Once you attach this you will be asked for a file description, which you should enter for your reference

Note
These attachments are not sent in the file to the lab because of size issues. These are for your reference only as these are held in your local database.
In order to save an attachment held on your local database you can select the file in the attachment section of SFSD when you view the sample and select the ‘Save/Open Selected’ button and this will open a dialog box to ask where you wish to save this file. Select the appropriate location and select save
In order to delete this attachment select the ‘Delete selected’ button.